![]()
![]()

You all have, no doubt, certainly seen an aerosol container and have probably used it too. When you press a button placed on the dispenser, a liquid is forced out as a fine spray. But do you know how this happens? This is based on the simple phenomenon of pressure. When a gas is kept under high pressure and is released suddenly, it moves to a place where the pressure is lower with great force and takes anything along with it. This is what happens with aerosol products. In aerosol products, the gas acts as the propellant and propels the product that is inside the container. The propellant (that is, the gas inside) is under such high pressure that when the can’s valve is opened, it rushes out to the low-pressure region, taking the product with it.
For a foaming bottle project, you will be working with a group of your classmates to make and test a model of what happens when a gas moves from a high pressure region to a low pressure region. You will be using a chemical reaction to make the gas in your model. This reaction is not what happens inside a real aerosol, but it is an easy way to demonstrate how a gas behaves under pressure.
Step 1
Collect all these materials for your group:
Step 2
It is important that your group is organized for this investigation. It will take several pairs of hands to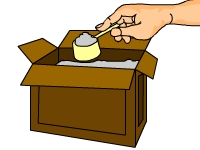 do this activity, so you will need to divide up the work in such a way that:
Step 3
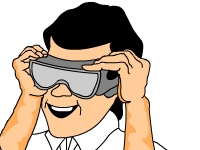
Make sure that the first thing everyone in your group does is to put on goggles first. Cover your tray with paper towels and put the bottle in the middle of the tray. Once all the materials are assembled and the recorder is ready, two tablespoons of dish detergent and three tablespoons of vinegar should be put into the bottle. (The funnel will assist this.) Rinse and dry the funnel.
Step 4
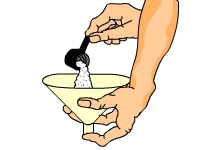
Put 2 tablespoons of baking soda into the funnel, but keep your finger over the end. Carefully put the funnel into the bottle and shake the baking soda into the bottle. Put your finger over the bottle and shake, then put it down in the center of the tray.
Safety Warning
Step 5
When you finish, talk over with your group members how it might be possible to increase the pressure of the gas inside the
bottle. Discuss your ideas with your teacher. Rinse out the bottle and try the investigation again. Your teacher will do a demonstration later to show what happens when the pressure of the gas is increased.
Prediction Point
Step 6
Look over your recorded observations. Share what your group has found with other groups in your class. See what ideas other groups have had for increasing the pressure of the gas inside the bottle. (This is carbon dioxide gas that you were making. Carbon dioxide is the same gas that gives carbonated beverages their "fizz", and is one of the gases used as a propellant in a small percentage of aerosol products.)
Once you follow all these steps accurately, your foaming bottle project is sure to be a cakewalk. Did anyone in your class have any ideas for how to release the gas and the other ingredients with a valve? Ask him to get an idea.
Try out the other sections
 Craft Ideas for Kids
 Benefits of Yoga for Kids
 School Projects & Homework Help
 Hobbies
