A full freight or passenger train is heavy, so the track it runs on has to be tough. Nowadays, rails are made from steel, which is a much stronger material than the cast iron used to the first railways. The shape of the rail also helps to make it strong. If you sliced through a rail from top to bottom, you would see it has an "I"- shaped cross section. The broad, flat bottom narrows into the "waist" of the I, and widens again into a curved head. Most countries use a rail shaped like this.
Tracks are made up of pieces of rail, which are laid on wooden or concrete crossbeams called slippers. Train wheels are a set distance apart, so rails must be a set distance apart, too. The distance between rails is called gauge. This project will show you how to make sets of railway tracks for the models on the following pages. Make at least two sets of tracks – the more tracks you make, the further your train can travel.
MAKING TRACKS
YOU WILL NEED
Two sheets of stiff card measuring 10¼ x 4¼in, pencil, ruler, scissors, white glue and glue brush, silver and brown paint, paintbrush, water pot, one sheet of foam board measuring 5 x 8in one sheet of paper measuring 8½ x 11in, masking tape, one sheet of thin card measuring 4 x 2in.
STEP 1
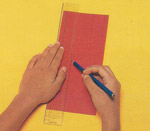
Place one 10¼ in x 4¼in piece of card lengthways. Draw a line ½in in from each of the outside edges. Draw two more lines, each 2¼in in from the outside edges. This is side A.
 STEP 2
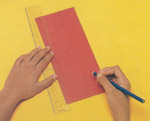
Turn the card over and place it lengthways. Measure and draw lines 1½in and 1¾in in from each edge. Repeat steps 1 and 2 with the second piece of 10¼in x 4¼in card.
 STEP 3
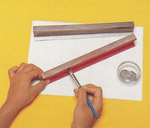
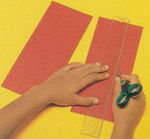
Hold the ruler firmly against one of the lines you have drawn. Use the tip of a pair of scissors to score along the line. Repeat for all lines on both sides of both pieces of card.
 STEP 4
Place the cards A side up. For each piece in turn, fold firmly along the two lines. Fold up from the scored side. Turn the card over. Repeat for the lines on side B.
 STEP 5
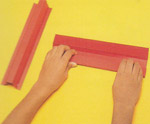
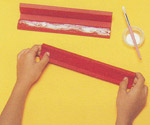
With the A side up, press the folds into the I- shape of the rail. Open out again. Glue the B side of the ¾in wide middle section as shown. Repeat for the second rail.
 STEP 6
Give your two rails a metallic look by painting the upper sides silver. Leave the paint to dry, and then apply a second coat. Leave the second coat to dry.
 STEP 7
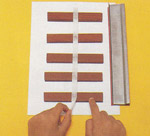
Use a pencil and ruler to mark ten 5 x ¾in strips on the foam board. Cut them out. Glue two strips together to make five thick railway sleepers. Leave them to dry.
 STEP 8
Paint the sleepers brown on their tops and sides, to make them look like wood. Leave them to dry, then apply a second coat of paint. Leave the second coat to dry, too.
 STEP 9
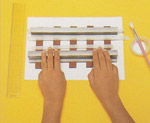
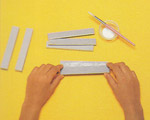
Lay the sleepers on the piece of paper, 1¼in apart. Make sure that they are exactly parallel to each other. Run a strip of masking tape down the middle to hold them in place.
 STEP 10
Glue the base of a rail, and press of the rail ¾in in from the edge of the sleeper. Repeat with the other track. Secure with masking tape until it is dry.
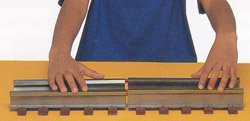
Make several sets of rails. To join the rails together, roll up the thin card. Insert one end into the top of the I-shape. Push the second rail into the other end.
Back to School Projects Main

 Parents' Day
 Craft Ideas for Kids
 School Projects & Homework Help
 Hobbies
