![]()
![]()

All around the world, rainforests are being cut down at an alarming rate. At the beginning of the 1900s, tropical forests covered about twice the area they do today. Experts estimate that an area of rainforest about the size of England is lost each year. One of the main reasons for this is logging – the felling of trees for timber. Many rainforest trees are made of valuable hardwoods, such as teak and mahogany, which are used for building houses and making furniture. Trees are also cleared to create roads and new pasture for cattle.
The roots of trees and other plants help to hold forest soil together. When the trees are felled, the soil is left bare. During heavy rainfall, the earth is washed away, just as it is in the first project. However, when forests are left alone, they sustain themselves indefinitely, recycling water and nutrients from the soil. You can see how this works by growing a mini-jungle. The bottle or jar reproduces the warm, moist conditions and constant high temperatures of a rainforest. The plants recycle their own moisture, so they rarely need watering.
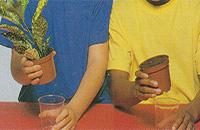
You will need: House plant, two plastic cups, plant pot, soil or soil mix, two watering cans.
1. Fit the house plant into the neck of one of the plastic cups. Fill the empty plant pot with soil or soil mix. Place the pot into the neck of the other plastic cup.
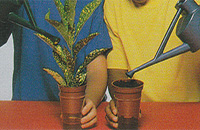
2. Pour water on to the house plant and into the pot of soil. What happens? You will find that water passes more quickly through the pot without the plant.
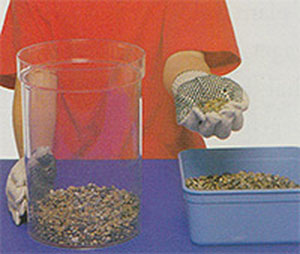
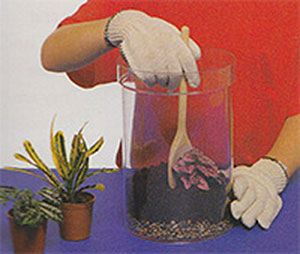
You will need: Large plastic bottle or jar with a lid, gloves gravel, charcoal, soil mix, spoon or trowel, small tropical plants, plant sprayer or watering can with sprinkler rose.
1. Wash your large plastic bottle or jar to make sure that it is clean. Place handfuls of gravel into the bottom of the bottle, to make the lowest layer of the mini-jungle.
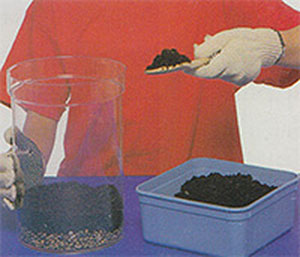
2. Combine a little charcoal with the soil mix. Add a deep layer of the mixture on top of the gravel, and then smooth out the soil so that it is level.
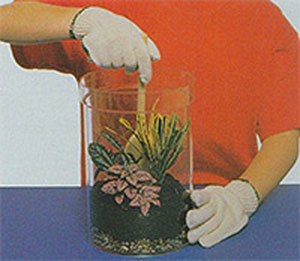
3. Make some large holes for the plants in the soil with a spoon or trowel. Then gently lift the plants out of their pots and lower them into the holes you have made.
4. Tamp the soil down around the base of each plant. You can use a spoon or a trowel to do this, if you find it difficult to reach that far with your fingers.
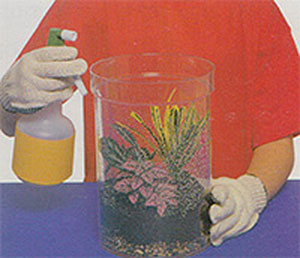
5. Spray the plants and soil quite thoroughly with water from a plan sprayer, or using a watering can with a sprinkler attachment. This is your tropical rain!
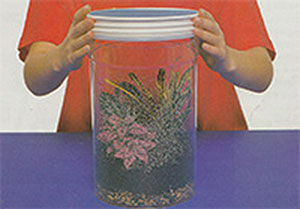
6. Put the lid on the bottle or jar, and your mini-jungle is complete. The water you have sprayed is recycled inside the bottle or jar, so you will not need to water your jungle often. Moisture from the plants condenses on the sides of the bottle or jar. It will then drip down into the soil, to be reused.
Try out the other sections
 Parents' Day
 Craft Ideas for Kids
 School Projects & Homework Help
 Hobbies
