![]()
![]()

Welcome to KidsGen's captivating webpage on fossils! Embark on a thrilling journey through time as we unravel the mysteries of Earth's ancient past. Here, you'll discover what fossils are, how they come to be, and why they're crucial in piecing together the puzzle of our planet's history. Whether you're a young learner or a curious explorer, our educational content is designed to make the world of fossils come alive. Join us in uncovering the wonders of prehistoric life and the science that brings it back to life!
The remains of some plants and animals that died long ago can be seen in rock as fossils. After an animal dies, it may become buried in sediments – rock pdivs ground down by wind and water. Slowly, over thousands of years, the sediments compact together to form sedimentary rock. The shape or outline of the plant or animal is preserved.
The study of fossils, called palaeontology, tells us much about how life evolved, both in the sea and on the land. Fossils give clues to the type of environment in which an organism lived, and can also help to date rocks.
These projects will help you to understand how two types of fossil came to exist. One type forms when sediment settles around a dead animal or plant. It hardens to rock, and the plant or animal rots away. This space in the rock is an outline of the dead animal or plant. This is usually how the soft parts of an animal, or a delicate leaf, are preserved. You can make this kind of fossil using a shell. In this case the shell does not decay – you simply remove it from the plaster.
The second project shows you another kind of fossil. Here, the skeleton of a decaying animal is filled with minerals. The minerals gradually become rock. This gives a solid fossil that is a copy of the original body part.
You will need: safety glasses, plastic container, plaster of Paris, water, fork, strip of paper, paper clip, non hardening modeling material, shell, wooden board, hammer, chisel.
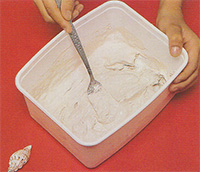
1. In a plastic container, mix up the plaster of Paris with some water. Follow the instructions on the package. Make sure the mixture is fairly firm and not too runny.
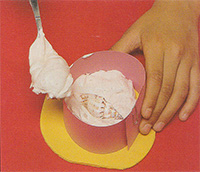
2. Make a collar out of a strip of paper fastened with a paper clip. Use modeling material to make a base to fit under the collar. Press the shell into the clay. Surround the shell with plaster.
3. Leave your plaster rock to dry for at least half an hour. Crack open the rock and remove the shell. You will then see the imprint left behind after the shell has gone.
You will need: spare paper, rolling pin, modeling material, shell, petroleum jelly, paper clip, strip of paper, glass jar, plaster of Paris, water, fork.
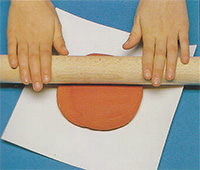
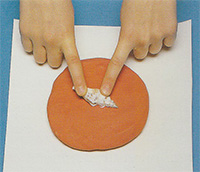
1. Put a spare piece of paper down on your work surface to protect it. Using the rolling pin, roll out some modeling material into a flat circle, roughly ¾ in thick.
2. Press your shell, or another object with a distinctive shape, deep into the clay to leave a clear impression. Do not press it all the way to the paper at the bottom.
3. Remove the shell and lightly rub some petroleum jelly over the clay circle, which is now the shell mold. This will help you to remove the plaster fossil later.

4. Use the paper clip to fasten the paper strip into a collar for the mould. Mix up some plaster of Paris according to the instructions, pour it in, and leave it to set for half an hour.
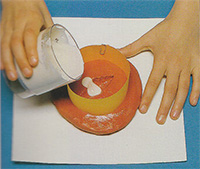
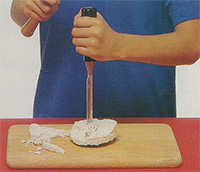
5. Remove the solid plaster from the mold. In order not to damage them, palaeontologists have to remove fossilized bones or teeth, from rock or earth, very carefully.
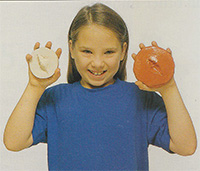
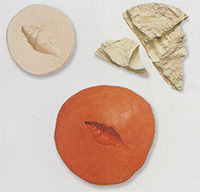
These are the finished results of the two projects. Real fossils are imprints of organisms that lived millions of years ago.
The different Ways in Which A Fossil can be formed :
Fossils are formed when the remains of an organism are quickly buried and preserved by sediment. Over time, the sediment hardens into rock, and the organism's remains become trapped inside.
There are five main ways that fossils can form:
Fossils are important because they provide evidence of the history of life on Earth. By studying fossils, scientists can learn about the evolution of different species, the environments in which they lived, and the causes of their extinction.
Here is an example of how a dinosaur fossil might form:
Dinosaur fossils are just one example of the many different types of fossils that can be found all over the world. Fossils of plants, animals, and even microbes can be found in rocks of all ages, from the oldest Precambrian rocks to the youngest Quaternary rocks.
Try out the other sections
 Parents' Day
 Craft Ideas for Kids
 School Projects & Homework Help
 Hobbies
